Compound Movements and Why You Should Do Them

Compound Movements and Why You Should Do Them

What are Compound Movements? 

What if I told you that doing compound movements in the gym burned more calories during your workout; would you know which exercises to do?  

What if I also told you that compound movements burn more calories postworkout than any other exercise, would you believe me? 

Imagine learning that this type of movement maximizes your time in the gym, helps you lose weight, and helps you burn more fat; would you do more?  

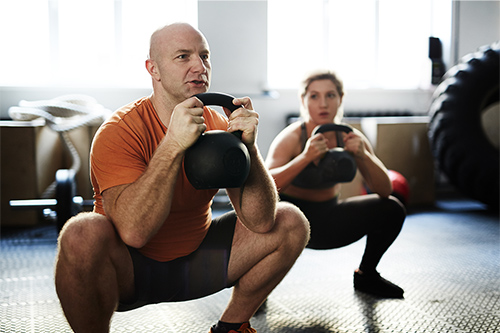
Compound Movements, also known as Compound Exercises, are multi-joint movements that work several muscle groups at one time, compared to isolation movements that work one muscle at a time.  

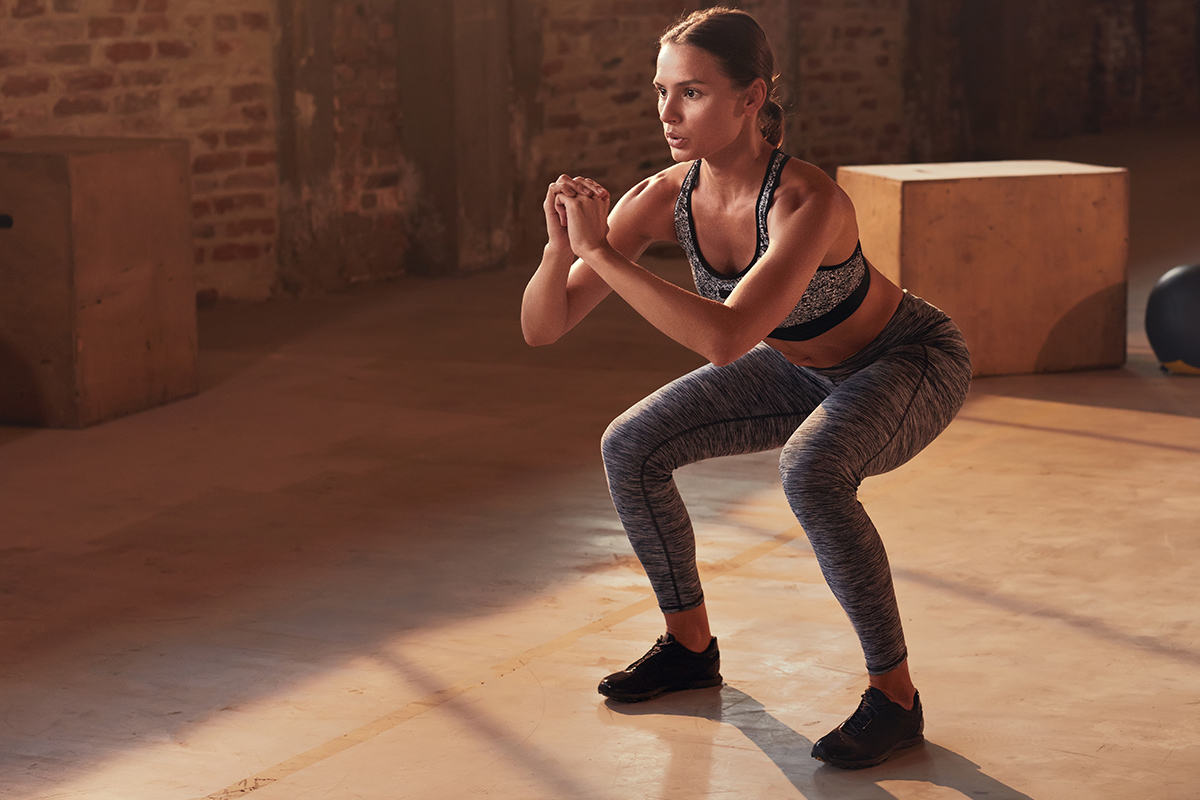
An example of a compound movement would be a squat. A squat works your quadriceps, glutes, hamstrings and core. An example of an isolation movement is a bicep curl, which only works the bicep. See the difference? One muscle versus many muscles. The more muscles you are working at one time the more calories and fat you will burn. Cool, right?  

Compound movements are not only for the gym but also can be a great home workout. You don’t necessarily need heavy weights. You just need a little bit of time and a little bit of space to get in some good compound exercises. 

Benefits of Compound Movements

One of the biggest benefits of compound movements is that they make effective use of your time. When you are short on time but want to put in a quick weighttraining workout, think compound movements. Other benefits include:  

+ more calories burned 

+ improved coordination 

+ improved flexibility and range of motion 

+ gaining more muscle  

+ improved strength

Best Compound Movements 

The following list is derived from an article by the American College of Sports Medicine. While these 7 items are personally my favorite, there are unquestionably other compound movements that might work better for you. It all depends on your level of fitness. Give them a try! 
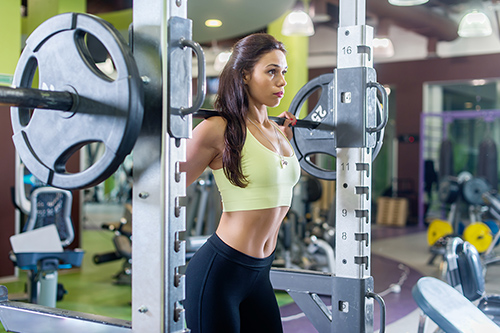
  1. Squats 
    • Areas of Focus – quadriceps, glutes, hamstrings and core 
  2. Deadlifts 
    • Areas of Focus – almost the entire body but especially the hamstrings, glutes, arms, core, and back (trapezoids)  
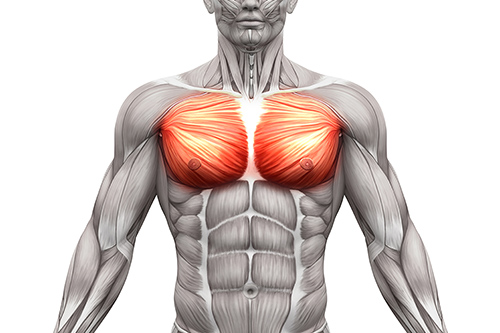
  3. Bench Press 
    • Areas of Focus – chest, shoulders and triceps 
  4. Pull-ups 
    • Areas of Focus – entire back region (emphasis on lats), forearms and biceps 
  5. Bent-over barbell rows (reverse grip) 
    • Areas of Focus – back region (emphasis on upper back; rhomboids, trapezoids), and biceps 
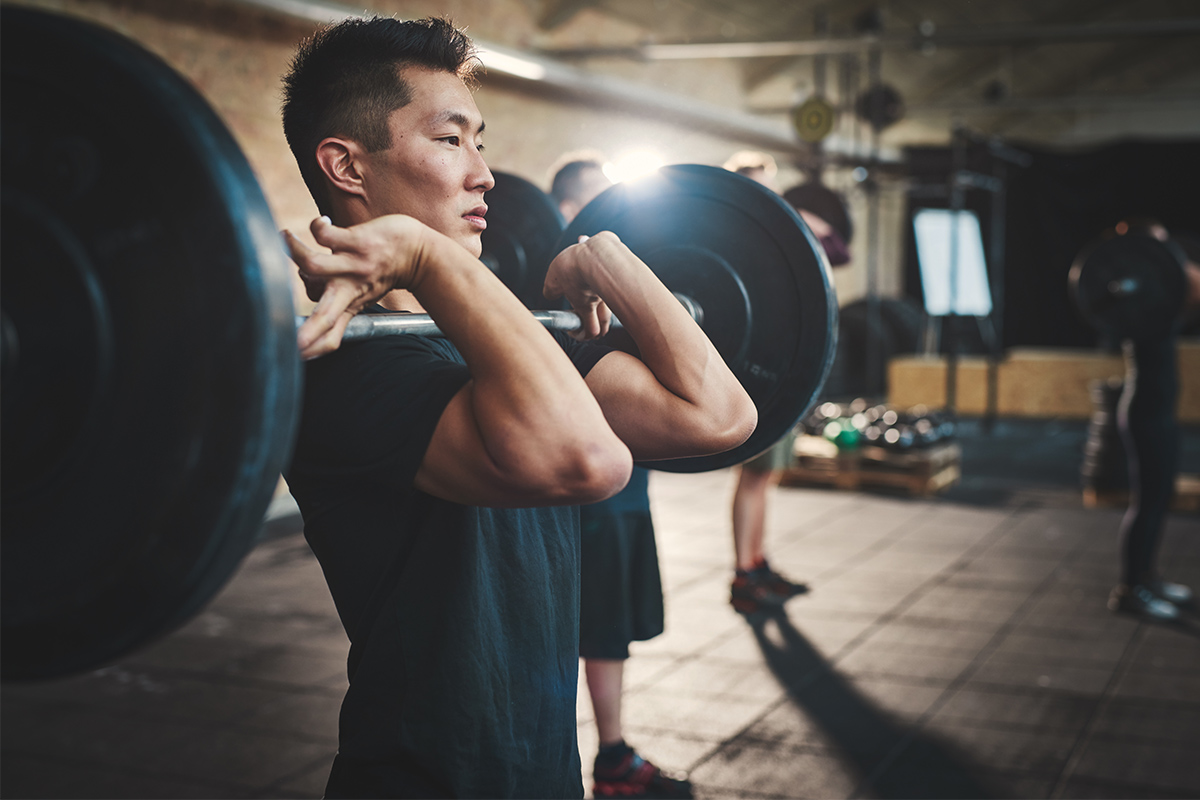
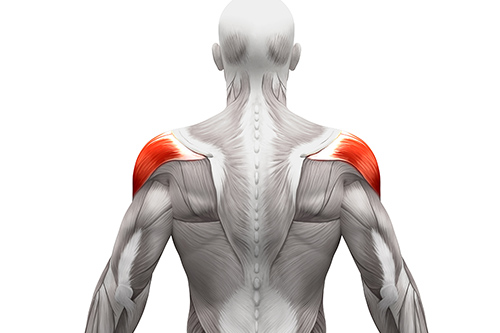
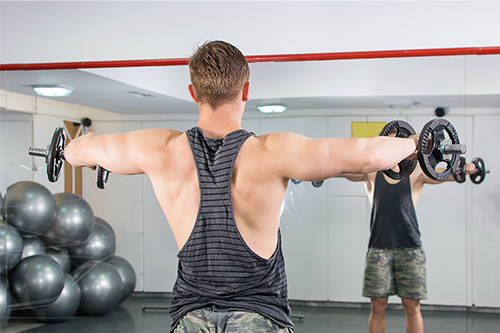
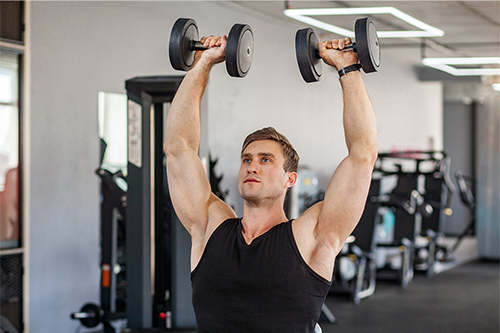
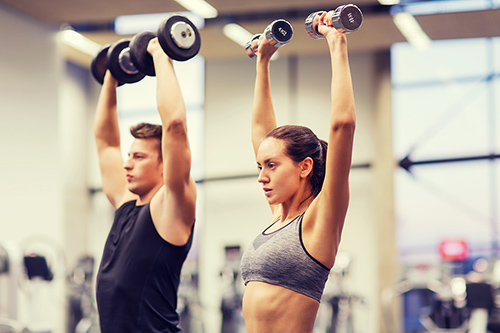
  6. Shoulder Presses 
    • Areas of Focus – entire deltoid region: front, medial and rear (emphasis on front deltoids) 
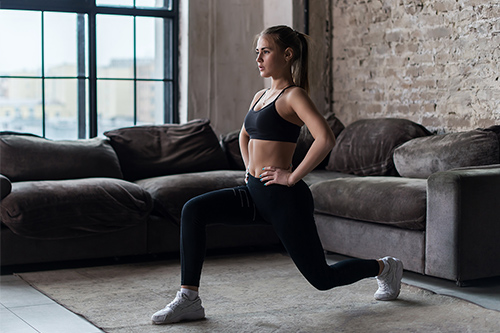
  7. Lunges (static) 
    • Areas of Focus – entire leg region (emphasis on glutes and hamstrings) 

Combine Compound Movements with Isolation Movements

Combining both types of movement makes for a great workout. For example, a squat to a bicep curl or a squat to a bicep curl to a shoulder press.

It’s important to keep good form while performing exercises. Squatting may seem safe but when weights are added and the exercise is done improperly, it could result in injury.

Always consult your doctor before starting an exercise program. Have an LA Fitness Pro Results® trainer help you with the basic principles of weightlifting and proper form when exercising.  

Bottom Line  

Next time you are in the gym or doing a home workout, incorporate a few compound movements. Get your heartrate up and boost your metabolism. Since compound movements engage several muscles at one time, it requires more energy from you. In turn, you burn more calories by spiking your metabolism and increasing your heart rate, which make you stronger.  

Check out this workout routine “The 2 Week Workout Finale for the Your Best Beach Body Ever!” This 2 week workout routine combines plyometrics, compound movements and integrated intervals so you can strut your stuff with confidence. For more articles like this one, subscribe to our newsletter to receive monthly highlights from the Living Healthy Blog.

How to Transition from Machines to Free Weights

How to Transition from Machines to Free Weights

Machines vs Free Weights 

Machines

Machines and free weights each have their advantages. Machines are great for people who need a bit more guidance. They support your body, usually have a seat and backrest, and they guide your movement which helps you learn how a specific exercise is supposed to feel. They’re great for people who are just starting out and need the direction a machine can provide.  

Both a benefit and a drawback of machines is that, often, they will isolate a single muscle. This can be great if you’re looking for a more targeted workout, but you’ll have to do a lot more exercises on a bunch of different machines to work more than one muscle group. The strength you gain from machines is also not very functional, but this may not be a concern if your focus is on aesthetics. 

Free Weights

Free weights are great for people who are looking to exercise multiple muscle groups at once. Because different muscles come into play to stabilize the weight as you move it, you get a more complete workout from one exercise. A drawback is that you are sometimes limited by what you can lift off the rack or by your grip strength. Your legs may be ready to squat more weight, for example, but your arms may not be ready to carry those couple extra pounds.  

The strength you gain from free weights is highly functional because your muscles are allowed to move naturally. You have the benefit of engaging parts of a muscle you normally wouldn’t engage on a machine, even though you’re doing a similar exercise. 

If you’re looking to transition from machines to free weights, we’re about to tell you how. There are some important precautions and considerations that can help make the transition easier and safer. 

Free Weights Don’t Weigh the Same

This sounds a bit ridiculous. How is squatting 250-pounds on a Smith machine (assisted squat machine) not the same as squatting a 250-pound barbell? Well, the answer is in the mechanics of the machine. Machines guide your muscles through a very linear motion. Your body doesn’t have to work to stabilize the weight (to keep it from tipping more one way than the other, etc.). Because of that, you don’t need to put as much effort into moving the weight that’s connected to a machine. 

>> When you transition from machines to free weights, you need to start significantly lighter and build your way up to find your working weight.  

Master Your Form First

The thing about machines is they stick you into a certain form. It’s great if you’ve never done a particular exercise and you need to know what it should look and feel like. However, once you step away from the machine, it’s all different. Your body will want to move differently to compensate for the position of your hands and feet and where the dumbbells or barbell happen to be resting. You may also notice that you have one arm or leg that is stronger than the other and that it is doing more of the work. This can also set the weight into a different balance that your stabilizing muscles will have to make up for. 

>> When you decide to take an exercise off the machine and onto the floor, you may notice weaknesses you hadn’t noticed before. Master your form first and then gradually incorporate weights. 

Don’t Push Your Muscles to Failure

It was easier to do this with machines because the equipment was relieving you of the weight once you had done your last rep. With free weights, pushing until your muscles can do no more can be dangerous, especially if your form is compromised. It’s important to leave your body a little breathing room and to have a spotter when you plan to challenge yourself in the weight room.  

>> Pushing your muscles to failure when using free weights can be dangerous. Always give yourself enough energy to complete your last rep with perfect form. 

For more workout tips, read up on what happens when you exercise on an empty stomach. Or, find out what you should know before you work out in cold weather. To stay up to date with our content, click to subscribe to our newsletter and receive monthly highlights from the LA Fitness blog! 

How to Create the Hourglass Illusion

How to Create the Hourglass Illusion

Strong legs and glutes shape your entire figure. This is partly because your lower body is made up of the largest muscle groups, which means you’ll burn more calories and sweat more quickly when you exercise your lower body. In addition to that, you can build a more proportional figure when you build muscle in your butt and hips! 

The hourglass shape coveted by many women comes from the ratio of the bust, waist, and hips. With this body shape, the bust and hips will typically be the same size, or within a few inches of the same size, while the waist is about 25% smaller than the bust and hips.   

Now, obviously we can’t change the bone structure we’re born with, but we can trick the eye into seeing the hourglass shape. As we mentioned in our post on How to Build the Illusion of Broad Shoulders, we believe healthy bodies are the best bodies! However, many women strive to achieve the hourglass ratio. If this is your goal, we’re sharing how you can create the illusion of curvy hips even if you weren’t born with them. 

Workouts That Sculpt Some Serious Curves

If you read our Broad Shoulders article, you will have learned that building specific upper body muscles will help give the illusion of a larger frame. The opposite is true for a woman’s body; accentuating the hips is the primary target! Building strong glutes gives you a natural butt lift and the toned curves can make your waist look smaller. Not to mention, all the new muscle is certainly no illusion, which means you’ll also be training for strength with these exercises. 

Our Pro Results® Trainer, Kayla V., specifies these 5 exercises for stronger hips and glutes:

Hip Thrusters/Bridges

The hip bridge activates your glutes and is one of the easiest moves to start with. You start by lying on your back with your knees bent and your feet flat on the ground. Without letting your hips rock or sway with the movement, raise your hips up and lower them back down. Squeeze your glutes at the top of each move. When you’re ready, you can add weights by holding dumbbells or a barbell across your hips.

Abductor and Adductor Workout

Abductor muscles are the ones that help you push outwards while the adductors help you pull inwards. When using a machine that targets your inner thighs, you’re using an adductor machine. A machine that works the outside of the thighs and hips is an abductor machine. 

The equipment itself is pretty simple. You just sit down, position your legs on the inside or the outside of the pads (depending on which muscle group you want to work on) and slowly open and close your knees.

Kettle Bell Swings

Despite how it may look, this one is not an arm workout. The movement of the weight comes from the power in your hips. Always start with a light weight when trying out new exercises until you get the hang of it.  

Hold the kettle bell while standing tall and with your feet shoulder-width apart. Your knees will naturally bend as you prepare to swing the weight upwards, but you’ll also want to intentionally squat to aid your momentum. Keep your body weight over your heels and use your hips to send the weight swinging upwards to eye level. Allow the kettlebell to come back down to the starting position between your legs. 

Weighted Squats

Weighted squats can be done with a barbell, dumbbells, or an assisted squat machine. You can also choose to carry a medicine ball or kettle bell. Before doing a weighted squat, make sure you can execute bodyweight squats with perfect form.  

Once you’ve mastered the bodyweight squat, you’ll be able to tell if you are compromising your form while carrying weights. Noticing poor form should tell you that you may need to decrease the amount of weight you’re holding.  

A good squat should look like you’re sitting in an imaginary chair. Your back should remain straight, and your knees should never come forward past your toes. 

Deadlifts

If you’re not ready to lift larger amounts of weight, dumbbell deadlifts are a great way to progress into heavier weightlifting.  

To do a deadlift with a barbell, stand behind a barbell you’ve placed on the ground. Keep a straight back as you bend to grip the barbell. Push your hips forward to come to a standing position and keep the barbell at arm’s length. Return the bar to the ground by squatting, but make sure you keep your back straight for the whole movement. 

Closing Thoughts

To create the hourglass physique, you must also build strength. Gone are the days when women feared strength training because they were afraid to get bulky. We’ve crushed those myths and now know that You Won’t Get Bulky Unless You Want To. For more information, listen to more strength training tips and QA’s on Episode 19 of our Podcast: Give Me Strength Training. 

As always, pay attention to pain or discomfort when working out, and use your best judgment when moving weights. 

To stay up to date with our content, click to subscribe to our newsletter and receive monthly highlights from the LA Fitness blog! 

How to Build the Illusion of Broad Shoulders

How to Build the Illusion of Broad Shoulders

After seeing it on every male model and superhero, you want that tapered V-shape, the one that draws attention to well-built shoulders, strong pectorals, pronounced lats, and a slim waist. Regardless of your natural body type, it is possible to achieve the look (or at least come close) if you work on certain muscles. Now, while healthy bodies are the best bodies, we know that a lot of people are working towards a specific aesthetic. If you’re aiming for that V-shape, we’re spilling the secrets to how it’s done.  

The Inverted Triangle

You might think that just because you naturally have narrow shoulders, you will never be able to achieve that inverted triangle body shape. We’re here to tell you, you’re wrong! 

 The V-shaped physique has more to do with the muscles you work than it has to do with your natural build. There are men out there with a bit of an advantage because of their bone structure. All that really means is that they don’t have to work as hard to attain the V-shape, but they still have to work for it.  

Workouts to Shred a V-Shaped Torso

As you may have gleaned from the first paragraph, training certain upper-body muscle groups will help you achieve this look. Specifically: your traps, shoulders, pectorals, and even your lats. The goal is to build those muscles up and trim your waist down. This is what gives the illusion of broad shoulders even if you’re born with a narrow build. 

Here are some workouts that are no illusion. They’ll train you hard and help you build a powerful body that isn’t just about the aesthetics.  

The Deltoid Muscle

The deltoid is a muscle that is commonly referred to in 3 parts: the front, the back, and the sides. To get a uniform look, you’ll need to do different exercises that target all three, or compound exercises that target multiple sections at once. 

Lateral Raises

Lateral Raises work the lateral deltoids, or the sides of the deltoid. These muscles really push your shoulder circumference out as they grow.  

To do a lateral raise, choose a slightly lighter set of dumbbells that is not difficult for you to hold. From a standing position, and with your elbows slightly bent, raise the weights up from your sides and up to shoulder height, then lower them back down. The important thing is to do this movement with control. Don’t let gravity assist you! Do the movement slowly to get the most out of the exercise.  

Arnold Press

The Arnold Press will target your anterior (front) deltoids. It looks something like a regular shoulder press but there is a rotation involved that asks for a little bit more from your shoulders.   

From a seated position, raise your dumbbells to your chest with your palms facing you. This is your starting position for the move. Next, raise the dumbbells up until your arms are straight. As you do this, rotate your palms so that they are facing away from you by the time they reach the top of the move. Complete the press by lowering and rotating the weights to their original position.  

Bent Over Reverse Fly

This one is for the posterior (back) deltoids. It’s very much like the lateral raises except you’ll be bending at the hip.  

Hold your weights and stand with your knees slightly bent. Bend at the hip while keeping your back flat. Your torso should be like a solid board on your body; there should be no slouching or slumping when you bend. Keeping a slight bend in your elbows, lift both of your arms out to the side and act as if you’re trying to squeeze your shoulder blades together. Then, lower the weights back to their starting position.  

The Trapezius Muscle

Now let’s work the traps. Big traps will give you a more rounded look and beef up your neck too. 

Shrugs

Shrugs are a great exercise to target this muscle, not to mention the technique is very simple. Hold a dumbbell in each hand or hold a single barbell. Simply shrug your shoulders to move the weight a few inches up and down. 

Chest Muscles

The Bench Press is perfect for targeting your chest muscles. Throw in an incline and now you’re asking the upper part of your chest to do more work. This is what gets your pecs to look more pronounced.  

Incline Bench Press

With your hands gripping the bar about shoulder width apart, and your palms facing away from you, lift the bar from the rack and hold it with your arms fully extended. In a smooth and controlled movement, bring the bar down to your chest and slowly push it back up to its starting position. You can also do this exercise with dumbbells.

Latissimus Dorsi Muscle

Get your lats into gear with the bent over row. As you can see by the diagram, the latissimus dorsi naturally taper in width. It makes sense that bulking up your lats can give you a broader appearance up top which easily adds to the V-shape you’re going for.  

Bent Over Row

There are a couple of different ways to perform this exercise, but we’ll focus on the single-arm row. Use a flat bench to support your knee and your hand on one side. The leg on the floor should be straight, as should the arm that’s resting on the bench. Grip a dumbbell with your free hand and fully extend it down towards the ground. This is your starting point. Focus on engaging your lats to pull the weight up to your chest and to lower it back down. 

Things to Consider

Though we specify certain muscle groups for each exercise, keep in mind that you’ll still get plenty of overlap in the muscles you engage with each workout. So, while that gives you a more well-rounded workout, you’ll want to be conscious of how you combine the exercises to avoid overusing certain muscles. Always pay attention to pain or discomfort and use good judgment any time you’re moving weights. 

For more workout tips and ideas, read our post on the Top 10 Most Popular Exercises and How to Perform Them Properly. Not a fan of free-weights? Crush your shoulder workout with these 5 Cable Exercises. To stay informed, subscribe to our newsletter to receive monthly highlights from the LA Fitness blog! 

Newbie Gains and How to Maximize Them

Newbie Gains and How to Maximize Them

Newbie gains are said to be the rapid development of muscle strength and mass in people who are new to strength training. It can be observed in some but not in others. So, is it a real thing or is the muscle growth a result of something else? 

Thinking about it logically, it makes sense that the body would respond to a new workout regimen by packing on the gains to help you power through the new physical demands. For our readers however, we don’t rely purely on what seems to make sense, so we dug into the research to see what we could find. 

Let’s Look at the Facts

Genetics


Records from various studies show that there are many biological variables that influence the rate of muscle growth. There is enough of a difference that people are classified as low responders or high responders based on their individual ability to initiate muscle growth.1 This implies that newbie gains can be very dramatic for some and hardly noticeable for others, and that genetics are a major deciding factor. 

This doesn’t mean that, if you’re at a genetic disadvantage, you’ll never build muscle. It will just be a slower, more painstaking process. The idea behind successful Newbie Gains is that your body has the building blocks to increase muscle but has not needed to use them. When you start a consistent training program, you activate those building blocks which leads to fast muscle gain. Research indicates that people who experience rapid muscle growth likely have more of these building blocks or are even able to multiply them during exercise.1 

Nutrition


Another factor is your nutrition. Your calorie intake can either feed your muscles and help them grow or deprive your muscles from what they need and hold their growth at a plateau. Essentially, if your goal is to increase muscle size, your nutrition will look different than that of someone who is exercising to lose weight. You would need to consume more calories than you burn (as opposed to aiming for a calorie deficit) in order to promote muscle growth.2 

Men vs Women

Another note to consider is the difference between men and women. This study shows that after training, women had an advantage in strength gained, while men had a slight advantage in the gain of overall muscle size. Both adhered to 12 weeks of progressive resistance training, yet the results they saw were noticeably different. 

To summarize, some of the primary factors that impact rapid muscle growth include your genetics, your nutrition, and to an extent, your gender.  

How to Make the Most of Your Early Training Period

Now that we know some of the limitations, let’s peer into what you can do to make the most of your early strength training period. 

Keep it Consistent

Your body needs to have a reason to build muscle. If you train several days a week, your body is more likely to feel the need to build muscle because it’s consistently being asked to perform at a certain level. If you’re more sporadic about your workouts, you might still build muscle but much more slowly. 

Don’t Hit the Gym Too Hard

You don’t need to push your muscles to the breaking point (yet). When your body is new to exercise, pretty much everything is benefitting and strengthening your muscles. Once body weight exercises become easy, step it up to dumbbells. Once dumbbells get too easy, take on barbells. You don’t want your body spending all of its energy on repairing your muscles when it could be spending that energy on building them up. In other words, challenge yourself to give your muscles the incentive to grow but don’t overdo it. 

Eat Right

Our Registered Dietitian, Debbie James, has shared her wisdom on the right nutrition for bulking. Read her advice to learn what you can do to feed your body what it needs while you’re building muscle. 

How to Structure a Meal Plan for Bulking 

Increasing Body Weight for Bulking 

When Bulking Up Isn’t Working 

Bulking During High-Intensity Bike Training 

Now that you know what advantages you have as a beginner, it’s time to head to the gym! Let us know in the comments what progress you’re making in your strength training. For more interesting reads, subscribe to our newsletter to receive monthly highlights from the LA Fitness blog! 

Sources

  1. Roberts, Michael D, et al. “Physiological Differences Between Low Versus High Skeletal Muscle Hypertrophic Responders to Resistance Exercise Training: Current Perspectives and Future Research Directions.” Frontiers in Physiology, Frontiers Media S.A., 4 July 2018, https://www.ncbi.nlm.nih.gov/pubmed/30022953.


  2. Stoppani, Jim, and Joe Wuebben. “10 Nutrition Rules to Follow If You Want to Build Muscle.” Muscle & Fitness, www.muscleandfitness.com/nutrition/gain-mass/10-nutrition-rules-follow-if-you-want-build-muscle.